
Saves of Wing Shots: Understanding Angles, Timing, and Positioning
Among all goalkeeper situations in handball, saves of wing shots carry a unique kind of complexity. The angle is tight. The shooting window is small. The attacker is flying through the air, creating new possibilities with every movement. And yet, despite how difficult this situation looks from the outside, many coaches treat wing saves as a secondary priority, something to practice briefly before moving on to more “important” topics like 9-meter shots or breakthrough saves.
I’ve spent 15 years working with goalkeepers around the world, and I can tell you: the goalkeepers who master saves of wing shots gain a competitive advantage that impacts the entire team. When a goalkeeper is confident in wing situations, the whole defensive structure changes. Wing defenders can take more risks. The team concedes fewer easy goals from positions that should be covered. And the goalkeeper builds confidence that carries into every other area of their game.
But here’s what I’ve also observed: most goalkeepers struggle with wing shots not because they lack physical ability, but because they lack understanding. They don’t fully grasp how the angle changes as the shooter moves through the air. They don’t know how to position their body to cover the most likely shooting zones. They react too early, too late, or in ways that don’t match what the shooter is actually doing. And because the situation happens so fast, they never get the time to think it through during the game.
This is why I want to walk you through the principles behind saves of wing shots in a way that gives you clarity, not confusion. Whether you’re a goalkeeper looking to improve, or a coach trying to help your goalkeepers understand this topic more deeply, the concepts in this article will change how you approach wing situations forever.
Key Takeaways
- Angles shape everything. Saves of wing shots improve immediately when goalkeepers understand how shooting angles change during the attacker’s jump and adjust their position accordingly.
- A proper wing stance reduces unnecessary movement. When the goalkeeper is positioned properly and the stance is stable and aligned with the shooting hand, the goalkeeper covers more space without relying on dramatic or unpredictable reactions.
- Reading the shooter gives the goalkeeper crucial extra time. Shoulders, jump direction, and arm position reveal the shot before the release. Goalkeepers who learn to read these cues feel more in control during wing shot situations.
- The first step forward can decide the outcome. Stepping forward at the right moment shrinks the angle, forces faster decisions from the attacker, improves access to the back post, and helps cover a bigger area of the goal.
- Different angles require different approaches. Small angles demand patience and precision. Normal angles require a well-timed step forward and proper reaction. Big angles demand adaptability and active movement to correct position based on the shooter’s jump direction.
Why Wing Shots Feel So Difficult
Let me start by acknowledging what every goalkeeper already knows: wing shots feel overwhelming. The shooter is close. The angle is tight. The goal behind you feels impossibly large compared to the small window you’re trying to protect. And unlike 9-meter shots where you have a bit more time to read the situation, wing shots demand decisions in fractions of a second.
But here’s what most goalkeepers don’t realize: the difficulty of wing shots is largely a perception problem. When you don’t understand the principles behind positioning and timing, your brain has to process too much information at once. Every variable feels equally important. Every movement from the shooter creates uncertainty. You’re reacting to the final ball release instead of anticipating what’s coming.
When you understand saves of wing shots at a deeper level, everything changes. The situation doesn’t get slower, but your brain processes it more efficiently. You know what to look for. You know where to position. You know which movements matter and which ones are distractions. This clarity transforms the experience from chaotic to manageable.
The main problem for most goalkeepers is not having a clear idea and plan for how to react to different kinds of wing shots. Without that plan, they surrender to automated responses that are often wrong and too early. They react without clear and patient follow-through. They guess instead of observe. And because they’re guessing, their confidence erodes over time.
Patience and deep understanding of this topic will make a huge difference in your performance. That’s what I want to give you in this article.
The Foundation: Understanding Wing Angles
Before we talk about reactions and saves, we need to talk about angles. Angles are the invisible architecture of every wing shot situation. They determine what the shooter can and can’t do. They shape where the ball can realistically go. And they tell the goalkeeper exactly how much space needs to be covered.
In my work with goalkeepers, I like to split wing angles into three categories: small, normal, and big. Each category requires a different approach, and understanding these differences is fundamental to mastering saves of wing shots.
Small Angle
A small angle occurs when the wing shooter is close to the goal line and their shooting options are extremely limited. In this situation, the goalkeeper has a significant advantage. The ball can only go to a narrow part of the goal, and if the goalkeeper is positioned correctly, the shooter is essentially shooting into a wall.
With a small angle, patience is everything. There is no need to make a step forward when the shot comes from a small angle. The angle is already tight enough. If the goalkeeper moves too early or too aggressively, they actually open up space that didn’t exist before. The key is to hold position, stay stable, and let the shooter make the mistake.
Normal Angle
A normal angle is the most common wing situation. The shooter has jumped from a position that gives them access to a reasonable portion of the goal, but the angle is still limited enough that proper positioning covers most options.
This is where the well-timed step forward becomes important. When the shooter jumps, a controlled movement forward shrinks the angle further, puts pressure on the attacker, and improves the goalkeeper’s access to both corners. But the timing must be precise. Moving too early exposes gaps. Moving too late means the step has no effect.
Saves of wing shots from normal angles require a combination of reading the shooter, positioning correctly, and executing a save reaction that matches the shot height and direction.
Big Angle
A big angle occurs when the wing shooter has created significant space, either through their jump direction, their arm position, or the defensive situation that allowed them more room. When the angle is big, the goalkeeper faces a different challenge: the shooting window is wider, and the predictability that helps in small angles is gone.
With a big angle, the goalkeeper would typically take a normal basic stance rather than the specialized wing stance, since the shooting options are too varied. Adaptability and active movement become essential. The goalkeeper must continuously adjust position based on where the shooter is moving and where their shooting arm is pointing.
Understanding these three categories is the first step toward confident saves of wing shots. Angles tell the story of the shot long before the ball is released, and once a goalkeeper can read that story, their reactions become smarter, faster, and far more effective.
The Wing Stance: Positioning That Covers Without Guessing
Every goalkeeper wants to make impressive saves, but in wing shot situations, the foundation is far less dramatic than many expect. Success starts with how you stand before anything happens. The wing stance is a preparatory position specifically designed for saves of wing shots from small or normal shooting angles.
This stance is different from the basic goalkeeper stance used for 9-meter shots or other situations. It’s adapted to the specific demands of wing angles, where the shooting window is narrow and the ball will come from a predictable side.
Key Elements of the Wing Stance
The wing stance positions the goalkeeper to cover the most likely shooting zones without excessive movement. The body is oriented toward the shooter’s hand, not just the shooter’s body. This distinction matters because the ball comes from the hand, not from the center of the player.
The arm position in the wing stance is particularly important. The arm on the side of the front corner (the corner closest to the shooter) should be positioned to cover that area effectively. The exact height depends on the goalkeeper’s body proportions and what they can realistically reach.
If you have a very young goalkeeper who is not tall enough yet to effectively cover the upper front corner with a lower arm position, you can adjust by using a higher basic stance arm position instead. The principles stay the same, but the execution adapts to what the goalkeeper’s body can realistically cover. As they grow and develop, you can gradually introduce the full wing stance positioning.
Showing Goalkeepers the Angles
One of the most valuable things coaches can do, and one that many neglect or ignore, is to show goalkeepers the angles from the wing position visually. You can use any kind of rope or elastic string for this. Stretch it from the wing shooting position to the corners of the goal, and suddenly the goalkeeper can see exactly what the shooter sees.
This visual representation makes the abstract concept of angles concrete. The goalkeeper understands that from this position, the ball can only go here or here. They see the limited window. They feel the advantage they have when positioned correctly. And they start to trust their positioning instead of second-guessing it.
When working on saves of wing shots, I always take time to show these angles before any shooting drills. It builds understanding that carries into every repetition.
Reading the Shooter: Seeing the Shot Before It Happens
A major part of mastering saves of wing shots is recognizing that the shot starts long before the ball leaves the shooter’s hand. A wing player communicates their intentions through their run-up, their jump, their shoulders, and the orientation of their shooting arm. When goalkeepers learn to read these cues, they gain time, clarity, and control in a situation that usually feels rushed and stressful.
The Jump Direction
A wing player does not just simply jump and shoot. They shape the shot while they are in the air. Their jump direction creates new angles and options for scoring. A jump that carries them toward the goal line keeps the angle tight. A jump that moves them away from the goal line opens up space.
Watching the jump direction gives the goalkeeper crucial information about how the angle is changing. If the shooter jumps parallel to the goal line or slightly toward it, the angle stays small and the goalkeeper can hold their position with confidence. If the shooter jumps outward, the angle is opening and the goalkeeper may need to adjust.
The Shoulders
Shoulders reveal intention before the arm does. When the shooter’s shoulders rotate to open toward the goal, they’re creating space for a shot to the back corner. When the shoulders stay closed, the front corner is more likely.
This cue is subtle but powerful. Goalkeepers who learn to watch shoulders feel like they have more time because they’re anticipating rather than just reacting.
The Shooting Arm
The position of the elbow and hand with the ball provides the final confirmation of where the shot is going. Is the arm high or low? Is it extended far outside the body line? Is the hand rotating toward a specific corner?
The arm can extend far outside the body line, expanding the area the goalkeeper needs to defend. This is why reacting only to the final ball release is rarely enough. By the time the ball leaves the shooter’s hand, most of the important cues have already happened. The goalkeepers who are successful in saves of wing shots are the ones who learn to observe the entire sequence: the run-up, the jump takeoff point, the position of the shoulders, the height of the elbow and hand with the ball, and the rhythm of the jump.
The Step Forward: When, Why, and How
One of the most discussed elements of saves of wing shots is the step forward. Done correctly, stepping forward at the right moment can be the decisive factor in a save. Done incorrectly, it can open up space that the shooter will gladly accept.
Why Step Forward?
Stepping forward shrinks the angle. From the shooter’s perspective, the goalkeeper suddenly covers more of the available shooting window. Options that seemed open a moment ago are now closed. The pressure on the shooter increases because they have less time and fewer choices.
Stepping forward also improves the goalkeeper’s access to the back corner. When you’re positioned on the goal line, reaching the back post requires a longer movement. When you’re a step closer to the shooter, that corner becomes more accessible.
When to Step Forward
Timing is everything. The step should happen as the shooter is jumping, not before and not too late after. If you step too early, the shooter can adjust in the air and find the space you’ve created. If you step too late, the shot is already released and your step has no effect.
The step forward is most important for normal angle wing shots. For small angles, there’s often no need to step forward because the angle is already tight enough. For big angles, the situation is more complex and may require different movements entirely.
Towards where the step forward should be directed
One of the most important things in saves of wing shot training is the direction of the step forward that the goalkeeper is making.
Many young goalkeepers instinctively step toward the corner, parallel with the goal line, believing that they are covering more space. In reality, that movement takes them away from the actual shooting line and angle, and opens the back post even more.
The step should always be directed toward the shooter’s takeoff point and toward the shooter’s hand.
This alignment keeps the goalkeeper in the middle of the wing shooter’s angle and prevents the misalignment that leads to late or incomplete reactions.
Once goalkeepers understand this and apply it consistently, their wing shot saves start improving. The movement becomes purposeful instead of instinctive, and the step forward transforms from “guessing” into a structured part of their tactical game and their technique.
Important Considerations
Making a step forward toward the player is not the only, exclusive way to position or react on wing shots. There are many varieties and things that have to be considered. The step forward is one tool among many, and the best goalkeepers know when to use it and when to stay put.
I want to emphasize this because I see many coaches teach the step forward as if it’s mandatory in every wing situation. It’s not. What’s mandatory is understanding the situation and choosing the appropriate response. Sometimes that means stepping forward. Sometimes it means holding position. Sometimes it means adjusting laterally. The goal is to match your movement to what the shooter is doing, not to follow a rigid script.
Video – Step Forward in Saves of Wing Shots
In this video, you can see a demonstration of the step forward for saves of wing shots and how it affects goalkeeper positioning.
One of the most common challenges I see with goalkeepers is not having a clear idea or plan for how to react to different kinds of wing shots. Without that clarity, they surrender to automated responses that are often wrong or too early, without patient follow-through. Understanding when and how to step forward makes a significant difference in performance.
A Few Important Reminders
The step forward is a powerful tool, but it’s not always the right choice. When the shot comes from a small angle, there is no need to step forward. Doing so actually opens the goal and gives the shooter more options.
Also, keep in mind that stepping forward toward the shooter is not the only way to position or react to wing shots. There are many varieties and approaches depending on the situation, the shooter’s jump direction, and the angle of shooting. What you see in this video is one important option that works well in normal-angle wing situations, but it should be combined with the other principles we’ve covered in this article.
Patience and deep understanding of this topic will make a huge difference in your saves of wing shots.
Video – How to React on Wing Shots – See, Decide, Do – Reading the Wing Shooter’s Flight Path
One of the concepts I return to constantly in my coaching is the difference between “see/do” and “see/decide/do.”
Many young goalkeepers see the wing player taking off and immediately do something, without a clear idea about why they did it or how they should do it. This reactive pattern leads to early movements, poor positioning, and frustrated goalkeepers who don’t understand why they keep conceding from the wing.
What we want to develop is different: the goalkeeper sees the visual input, then decides what and how to respond based on what they observed, and only then executes the save reaction. This sequence takes practice and patience, but it transforms wing shot saves from guessing into purposeful action.
What You’ll See in This Video
In this video, you can see a goalkeeper saving a shot from a normal wing angle. Watch the full sequence:
The goalkeeper makes the first step forward toward the shooter’s takeoff point, leading with the leg closer to the post. Then the other leg joins to establish a balanced stance. From there, he follows the shooter’s flight path with small side steps, staying aligned with the hand holding the ball. Throughout all of this, he remains patient and calm, waiting for the shooter to reveal the shot before reacting.
This calmness is a weapon. The more composed the goalkeeper stays, the more the wing player has to think about how to score. Compare this to the usual mistake young goalkeepers make: reacting too early, committing before the release, and opening up space that the shooter will gladly take.
Remember: This step forward approach applies to normal-angle wing shots. When the shot comes from a small angle, there is no need to step forward. And stepping forward is not the only way to react to wing shots. There are many approaches depending on the situation. But this video shows one effective method that every goalkeeper should understand and practice.
Front Post or Back Post? Choosing What Your Body Covers
One of the most decisive skills in saves of wing shot situations is knowing which part of the goal your body should naturally cover, and which part of the goal demands an active save reaction. Many goalkeepers try to defend everything at once, and that usually leads to protecting nothing well. This is where strategy becomes just as important as technique.
Front Post Saves
In wing shots from smaller wing angles, covering the front post should be the priority for young goalkeepers.
When the goalkeeper stands correctly and reads the shooter with patience, the front post is protected almost automatically. What surprises many coaches is how little movement this actually requires. It is more about posture, angle, and trust in the stance than about the movement, reactions, and effort. Small details, like shoulder alignment, foot orientation, and weight distribution, decide whether this part of the goal feels covered or exposed.
These details are exactly the kind of adjustments that create instant improvement once goalkeepers understand them, yet they are rarely taught in full depth and detail.
Back Post Saves
Covering the back post brings a completely different challenge.
This is where the situation becomes more dynamic and where the goalkeeper’s decision-making under pressure really matters. To cover the back post effectively, while being properly positioned on the first post as well, the goalkeeper needs a combination of:
-
A well-timed step forward
-
A clear read of the jump direction
-
A shot height and direction appropriate reaction technique
-
Control of own body rotation and balance
Each of these elements influences the others. If the step forward is great but the timing is late, the chance to save is gone. If the reading of the situation is correct but the technique does not match the shot height and direction, the ball slips through. If the goalkeeper’s body collapses backward or rotates too far, even strong reactions lose their structure.
What makes this part of saves of wing shot work so exciting is how all these pieces fit together. Once a goalkeeper understands how to combine reading, timing, positioning, and footwork, the back post stops being a “problematic area” and becomes a space they can control with confidence.
Why This Decision Matters So Much
Choosing what your body covers and what your movement covers shouldn’t be “guessing”. It is a teachable system. When coaches and goalkeepers understand the principles behind this decision, saving shots from the wing positions becomes far more predictable and manageable than it looks.
And this is exactly why I was inspired to make my Level 2 Video Course for coaches. The video course explains and breaks down this topic in practical detail, shows how to coach it step by step, and explains how young goalkeepers can progress from basic understanding to advanced reading of the game. The course turns a complex decision into a repeatable habit, and that shift is what elevates a goalkeeper’s performance on the wing dramatically. This article gives an insight, a taste of the concept, and the video course shows how to master it.
Correcting the Most Common Mistakes
Even talented goalkeepers struggle with saves of wing shot situations when their saving technique is performed in a wrong way. These mistakes are not signs of a goalkeeper lacking potential. They simply show that the wing position demands clarity and structure. Once these patterns of early adopted mistakes are corrected, goalkeepers often experience a big improvement in both confidence and consistency in performance.
Here are some of the mistakes that happen most often in goalkeeper training around the world:
1. Twisting backward during the save
This movement shifts the goalkeeper’s center of gravity away from the shot and opens the far post. It also slows down the arms reaction, making even the correct reaction ineffective.
2. Stepping forward toward the corner instead of toward the shooter’s shooting arm
This is one of the most widespread mistakes in saves of wing shot scenarios. This idea can make some kind of sense at first for some goalkeepers or coaches, but it takes the goalkeeper out of alignment with the shooting hand and makes the back-post reaction significantly harder to protect. A simple correction here often transforms the entire wing performance.
3. Reacting too early (or too late)
Goalkeepers sometimes reveal their intention before the shooter has even released the ball. Players read this instantly. A premature weight shift, leg lift, or arm drop gives the attacker exactly the opening space and angle they need to score. If goalkeepers react too late, players already used the advantage of their jump and arm angle and open space.
4. Staying Frozen in One Place
The opposite problem: some goalkeepers stand completely still while the wing player is flying through the air. They don’t follow the shooter’s movement or adjust their position based on what’s happening. The result is poor coverage and missed saves. Goalkeepers need to follow properly every millimeter of the shooter’s movement with appropriate adjustments.
5. Lifting the reacting leg too high
Especially against low shots, this mistake creates the gap that wing players aim for. Many young goalkeepers automate this habit early. They feel like they are “attacking” the ball if and when they lift up their foot or leg. They don’t understand that they are actually opening the space and making it easier for shooters to score. A high leg might feel powerful sometimes, but in these situations it usually works against the goalkeeper rather than helping them.
6. Using identical save reactions for front-post and back-post shots
Covering and closing the front or the back post of the goal do not require the same movement. The angle, distance, timing, and biomechanics are different. When a goalkeeper uses one same save reaction for every wing shooting scenario, the attacker easily gains a clear advantage.
Why Addressing These Mistakes Matters
Fixing these patterns early creates a strong technical base that supports all future development. But understanding how to correct them and how to teach the corrections to young goalkeepers takes real understanding of the topic and real structure in coaching work.
Once again, my Level 2 Video Course doesn’t only list these mistakes. It shows coaches how to work on them, how to coach them, and how to help a goalkeeper build consistent, repeatable habits for saves of wing shot situations. The difference between reading about these mistakes and seeing the drills, watching the demonstrations, and hearing the detailed coaching cues is big and valuable.
Training Principles for Wing Saves
Developing excellent saves of wing shots requires structured, progressive training. This is not something that improves through occasional repetition. It needs dedicated time and careful methodology.
Start With Understanding
Before any shooting drills, make sure the goalkeeper understands the angles visually. Use ropes or strings to show the shooting windows. Discuss the three angle categories. Explain why the wing stance looks different from the basic stance. This foundation of understanding makes all subsequent training more effective.
Dry Drills First
Before adding balls and shooters, practice the movements themselves. The wing stance. The step forward. The save reactions for different shot heights. These dry drills teach the goalkeeper how to position and move properly without the pressure of incoming shots. Once the movement patterns are solid, then proceed to shooting drills.
Progress Through Angle Categories
Work systematically through small, normal, and big angles. Don’t mix everything together from the start. Let the goalkeeper develop competence in one category before adding complexity. This builds confidence and allows for deeper learning.
Include Shot Height Variations
Make sure training includes shots to all areas of the goal: high front corner, high back corner, middle, and low. Saves of wing shots are complete only when the goalkeeper can handle all possibilities.
Film and Analyze
Whenever possible, film your goalkeepers during training and games. Watching yourself is one of the most powerful learning tools available. The goalkeeper can see their positioning, their timing, their reactions. They can identify what works and what needs adjustment. This self-analysis accelerates improvement significantly.
Build a Personal Game Concept
Ultimately, every goalkeeper needs to develop their own approach, understanding, and own style to wing saves. The more they understand, the better they will be. Encourage them to think about what works for their body, their style, their strengths. Help them create a personal game concept for wing saves that they own and trust.
Why Coaches Should Train Wing Saves Separately
Many coaches group wing shots together with general shooting drills, assuming the goalkeeper will somehow “discover” the solution through repetition. In reality, saves of wing shot situations require far more precision and awareness than most combo drills can provide. The wing position has its own logic, its own movement patterns, and its own demands. Treating it as “just another shot” often leads to frustration for both the goalkeeper and the coach.
To perform well on the wing, the goalkeeper needs a clear explanation, and a combination of skills that do not show up naturally in standard training:
-
A stance and position designed specifically for the size of the shooting angle
-
A clear sense of how wing shooting angles open and close
-
Timing that matches the attacker’s jump and flight pattern, not only the ball release
-
A different approach to the first step forward
-
Separate reaction techniques for high, middle, and low wing shots
Each of these elements requires deep understanding and focused practice. When a young goalkeeper works only in “blended shooting scenarios”, they rarely get the repetitions needed to build these habits. They may have a few lucky saves, but consistency stays out of reach.
This is why isolating and working on saves of wing shot techniques is so important. It gives the goalkeeper a controlled environment to understand the mechanics first, without the pressure of reading the entire attack. Once the foundation is solid, integrating these skills into game-like situations becomes much easier and far more effective.
In my Level 2 Online Course for coaches, the training structure follows a clear progression:
-
First the wing stance and position, so the goalkeeper knows how to position with confidence.
-
Then the concepts about the first-step forward, which shape the timing of every wing save.
-
Next – the reaction saving techniques, matched to shot height and angle of shooting.
-
Finally, the integration, where everything is combined into realistic saving situations.
This layered process is what turns wing shot saves from unpredictable moments into something repeatable and controlled. This blog post gives an overview of why all of this matters. But since wing shots are a complex and demanding tactical topic, the Level 2 Video Course shows how to understand and coach it in a way that makes your goalkeepers noticeably stronger in this position.
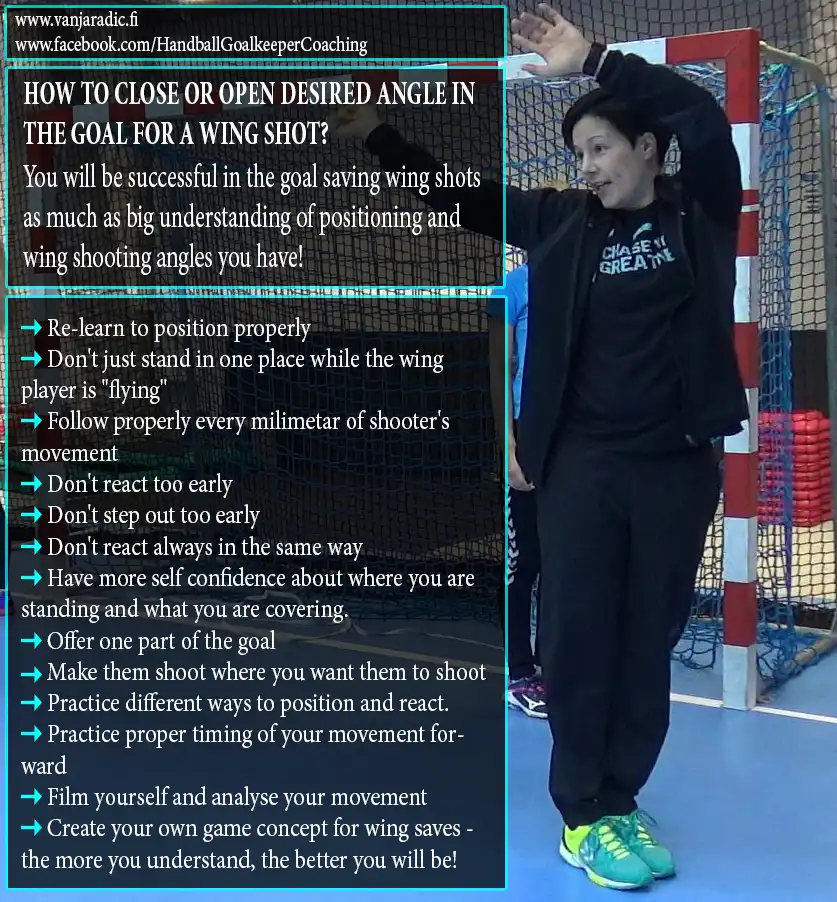
To Summarize – A Few Tips For Saving Wing Shots
Here are few tips you should keep in mind when working on saves of the wing shots:
-> Re-learn to position properly.
-> Don’t just stay in one place while the wing player is “flying”.
-> Follow properly every millimeter of shooter’s movement.
-> Don’t react too early.
-> Don’t step out too early.
-> Don’t react always in the same way.
-> Have more self confidence about where you are standing and what you are covering.
-> Offer one part of the goal.
-> Make them shoot where you want them to shoot.
-> Practice different ways to position and react.
-> Practice proper timing of your movement forward.
-> Film yourself and analyze your movement.
-> Create your own game concept for wing saves – the more you understand, the better you will be!
Putting It All Together
The complexity of saves of wing shots can feel overwhelming when you first encounter all these details. But remember: complexity in understanding leads to simplicity in execution. When you truly understand angles, positioning, reading the shooter, and timing, the actual save becomes more natural.
Here’s what I want you to take away:
The better you understand different ways to position and react on different wing shots, the better you will become at saving those shots. Understanding is the foundation. Everything else builds on top of it.
Patience makes a huge difference. Rushing leads to mistakes. Waiting, observing, and then reacting with purpose leads to saves.
There is no single “correct” way to save every wing shot. The correct response depends on the angle, the shooter’s movement, and countless other factors. Your job is to develop a repertoire of options and the judgment to know which one fits each situation.
Every wing shot situation is a mini-story with a start, middle, and end. The shooter approaches. They jump. They shape the shot in the air. They release. The goalkeeper who reads this entire story, not just the final chapter, has a massive advantage.
Wing saves are a very big and complex chapter in handball goalkeeper training, and they deserve extended attention in your training process. The payoff of proper work on saves of wing shots is incomparably big, because once your goalkeeper understands this demanding topic, your entire team benefits.
I hope this article has given you the understanding and confidence to approach wing shot situations differently. Not as a chaotic, overwhelming challenge, but as a readable, manageable situation where the goalkeeper has real advantages when they know how to use them.
Keep working on this topic. Keep refining your understanding. And watch how your wing saves transform when knowledge replaces guesswork.
Video – How To Save Wing Shots
In the video below you can find a short description and example of the way how I start working with young goalkeepers to understand how react on wing shots that are coming from different angles:
Video: How to React on Wing Shots From a Small Angle of Shooting
In this video, you can see examples of how a goalkeeper should react to wing shots that come from a small shooting angle.
The key principle here is restraint. When the shooting angle is small, the goalkeeper’s job is to position properly, observe the shooter, wait for the shot, and then react accordingly. There is no need to step forward. In fact, stepping forward in this situation would open the front post unnecessarily and give the shooter more space to score.
This is one of the most common mistakes I see, even with senior-level goalkeepers. They feel like they need to “do something” and end up making a movement that actually works against them. From a small angle, patience and trust in your positioning are your biggest advantages. The shooter already has limited options. Your job is to not give them more.
Watch how the goalkeeper in this video stays composed, maintains proper stance, and reacts only when the shot is released.
Video – Wing Shot Save By Nikola Portner
In this video, you can see an excellent example of a wing shot save by Nikola Portner that demonstrates several key principles we’ve discussed in this article.
Watch how Portner maintains proper positioning throughout the entire sequence. He doesn’t commit too early or guess where the shot will go. Instead, he follows the shooter’s hand with the ball and tracks the flight path as the wing player moves through the air. This is exactly what we mean by reading the shooter.
What stands out most is his patience. Many goalkeepers would have reacted before the shooter even released the ball, giving away their intention and opening up space. Portner waits, stays aligned, and lets the shooter reveal the shot before making his move. The result is a clean, controlled save that looks almost effortless, but is actually the product of excellent positioning and timing.
Video telestration in the video sponsored by Coach Paint – ChyronHego.
This is a great example to study and learn from.
Video – Wing Shot Save By Jelena Grubišić
In this video, you can see another excellent example of a wing shot save, this time by Jelena Grubišić.
Notice how she applies the same principles we’ve been discussing: proper positioning before the shot, patience while the shooter moves through the air, and constant tracking of the shooter’s hand with the ball. She doesn’t rush or guess. She waits for the right moment and then commits fully to the save reaction.
What makes saves like this look smooth is actually the discipline that happens before the reaction. The positioning is correct, the reading is accurate, and the timing is patient. By the time she moves to make the save, most of the work is already done.
This is a great example to watch alongside the Portner save to see how these principles apply across different goalkeepers, both male and female, at the highest level.
Video telestration in the video sponsored by Coach Paint – ChyronHego.
Video – Side Jump Middle Wing Save Reaction
In this video, you can see one of the exercises I use for practicing the so called “side jump” middle save reaction for wing shots from normal or big angles.
What to Focus On
The main focus of this exercise is on the additional lateral load for the outside leg and on starting and ending the reaction from a proper stance. Pay close attention to the position of the hands before, during, and at the end of the reaction. These details matter more than most coaches realize, and they should be worked on deliberately.
When the stance is correct at the start and the goalkeeper returns to a balanced position at the end, the whole movement becomes more controlled and repeatable. This is what separates a lucky save from a reliable technique.
An Important Reminder
This is only one of many ways to react to wing shots. It works well for middle-height shots from normal or big angles, but it should not be the only save reaction your goalkeepers practice. As we’ve discussed throughout this article, different angles, shot heights, and situations require different responses. Build a full toolbox, not just one tool.
Video – Combo Exercise – Normal Angle and Big Angle Wing Shots
In this video, you can see a combo exercise for a double save reaction: a wing shot from a normal angle followed by a wing shot from a big angle.
Why This Combo Matters
As we’ve discussed throughout this article, normal and big wing angles require different responses from the goalkeeper. By combining them in one exercise, you train your goalkeepers to adjust their positioning, timing, and reactions quickly based on how the shooting angle changes.
This kind of training mirrors what happens in games when wing players vary their takeoff points or when the ball moves quickly between different wing situations. Goalkeepers need to recognize the angle, adapt their approach, and execute the appropriate save technique, all within seconds.
This combo exercise is just an example, and I hope it serves you as an inspiration when you’ll be creating your own combo drills and progressions.
A Note on Progression
This is an advanced exercise. Before working on combo drills like this one, make sure your goalkeepers can execute saves from both normal and big wing angles separately with proper technique. And make sure that your goalkeeper’s basic technique is good. Once those foundations are solid, combining them builds the adaptability and quick decision-making that separates good goalkeepers from great ones.
Video – Combo Shooting Exercise For Saves of Wing Shots
In the video below, you can see a combo shooting exercise for saves of four wing shots with 4 different wing shots saving techniques.
Before applying and using this shooting combo with less advanced goalkeepers, please make sure that they are able to perform separately each of these save technique movements properly.
Stay in Touch
Do you have any coaching challenges you’d like me to address? Let me know what topics you struggle with most in goalkeeper coaching by filling out this form.
Never miss an update
Subscribe to my newsletter to receive updates about my online and in-person projects, research papers, creative projects (blog posts, books, e-books), and new online programs.
My Online Video Courses:
– Level 1 Video Course for Coaches
– Level 2 Video Course for Coaches
– Sliding Technique Video Course
– Agility Ladder Drills Video Collection – 102 drills
Subject to Copyright
Unauthorized use and/or duplication of any content from this website without express written permission from this site’s owner is strictly prohibited. All content (including text, data, graphics files, images, illustrations, videos, and sound files) contained in www.vanjaradic.fi is copyrighted unless otherwise noted and is the property of Vanja Radic Coaching. If you wish to cite or use any content from my website, please contact me first to obtain permission.
No responses yet